After completing this lesson, you’ll be able to:
For the exercises in this course, you are a technical analyst in the GIS department of your local city. You have plenty of experience using FME Form, and your department is now investigating FME Flow to evaluate its capabilities.
There are many departments within the city, and one of your tasks is to take the data from each department and merge it together into a single corporate database.
Because each department produces its datasets in a different format and style, you use FME for this task and carry it out on a weekly basis.
One of the reasons for purchasing FME Flow is to automate this procedure, so let's start implementing that.
Open the starting workspace (C:\FMEData\Workspaces\PublishWorkflowsToTheWeb\exercise-publish-to-fme-flow.fmw) in FME Workbench. This workspace reads in a GML file of fire halls and a KML file of neighborhoods in the city of Vancouver.
The workspace then projects the neighborhoods to match the fire halls and clips the fire halls to the boundaries of the neighborhoods. Finally, it writes out the fire halls with a separate file for each neighborhood (a feature type fanout). Because the focus of this course is working with FME Flow, the workspace uses a NULL writer.
First, save the workspace. It is always a good idea to save the workspace before publishing to FME Flow. Next, ensure that Prompt for User Parameters is disabled, then run the workspace. If the workspace won't run on FME Form, then it is not likely to run on FME Flow. If you get the Unexpected Input dialog, it is safe to ignore it.
Once the workspace has been run, inspect the translation log. Your translation log should look like the one below:
Now we have a workspace and know that it works correctly, let's publish it to FME Flow.
In FME Workbench, choose File > Publish to FME Flow from the menubar. As this is the first time we've connected to our FME Flow, we'll need to create a new connection, so in the Publish to FME Flow wizard select Connect to FME Flow from the drop-down menu:
In the dialog that opens, enter the parameters provided by your training instructor or FME Flow administrator. For live Safe Software courses, the parameters will be as follows:
You may or may not (probably not) need to enter a port number with the hostname, depending on how the system is set up.
Click OK to authenticate the connection and return to the previous dialog. Make sure the new connection is selected.
The next step is to choose a repository to store the workspace in.
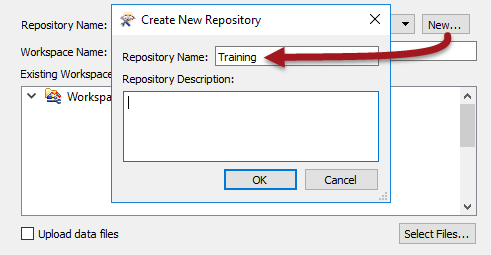
For this exercise, we’ll create a new repository by clicking the New button. When prompted, enter the name Training.
Click OK to close the Create New Repository dialog. Enter a name for the workspace if it doesn't already have one. Click Next to continue the wizard.
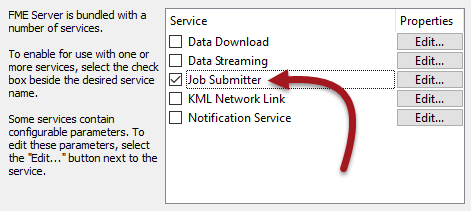
In the final screen of the wizard, we can register the workspace for use with various services.
Select the Job Submitter service as this is the only service we are using for now:
... and click Publish to complete publishing the workspace.
After a workspace is transferred to Flow, the log window displays a message reporting which workspace has been published to which repository and for which services. It will look something like this: